Stapling Lacerations 101: It’s Easy!
Remember my posts on Suturing 101 ? If you are a new nurse practitioner or NP student, I hope you’ve gotten a chance to practice. Today, I’ve got another technique to add to your wound closure arsenal- stapling.
There is nothing better than a staple-worthy laceration. Stapling is quick, easy and much simpler to learn than suturing. Experts say stapling is three to four times faster than wound closure with sutures and is also associated with a lower rate of infection. Let’s take a quick look at the in’s and out’s of this invaluable technique.
Which Wounds Can be Stapled
When a patient with a laceration presents to your clinic, you must determine the appropriate method of closure- skin adhesive, sutures or staples. Once you become familiar with stapling it can be tempting to staple, well everything. Although stapling is quick and easy, choose your closure method carefully. Stapling is best for wounds on the scalp, abdomen, back or extremities. Wounds on the hands, feet, face and neck should not be stapled.
What You Will Need
In keeping with the simple nature of skin stapling, all you need to staple a wound is…drumroll…a stapler. Skin staplers come pre-loaded and hold anywhere from 5 to 25 staples. You may also want forceps to help hold the wound edges together as you place staples. And, don’t forget your wound cleaning supplies.
A Little Wound Prep
Once you have determined a laceration is appropriate for staple closure, clean the \wound thoroughly. Check the wound carefully for foreign bodies and other evidence of complication. Numb the area with anesthetic such as lidocaine. If the wound is small, you may elect not to numb the area as placing one or two staples may be less painful than anesthetic administration. A topical anesthetic such as EMLA cream may also be considered.
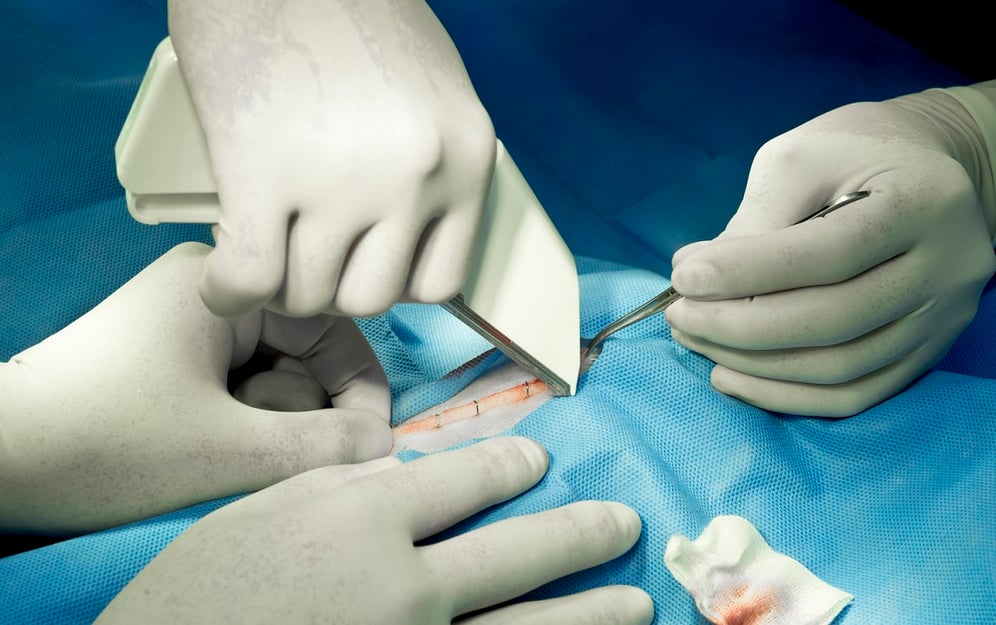
Let’s Get Stapling
Approximate the edges of the wound together with either your non-dominant hand or forceps. Line up the center of the laceration with the center of the head of the stapler. Press down firmly on the laceration. The depth of staple placement depends on how hard you press the stapling device against the skin. Squeeze the handle or activator on the stapler and a staple will be inserted into the skin. It’s that easy. Continue placing staples, about 3 to 5 mm apart until the wound is completely closed.
Staple Removal
Staples are typically removed in about 7 days on the scalp and 10 days on the back, abdomen and extremities. To remove skin staples, use a skin staple removal tool. Place the two-pronged edge of the tool under the staple against the skin. Squeeze the handles of the tool until fully closed lifting the staple from the skin. This process is pictured to the right.
Practice, Practice, Practice
As with any medical procedure, a little practice is in order before stapling a wound on a real, live patient. You can actually purchase a skin stapler on Amazon and practice on a piece of fruit such as a banana in the comfort of your own home. Watch this video for a little extra tutorial.